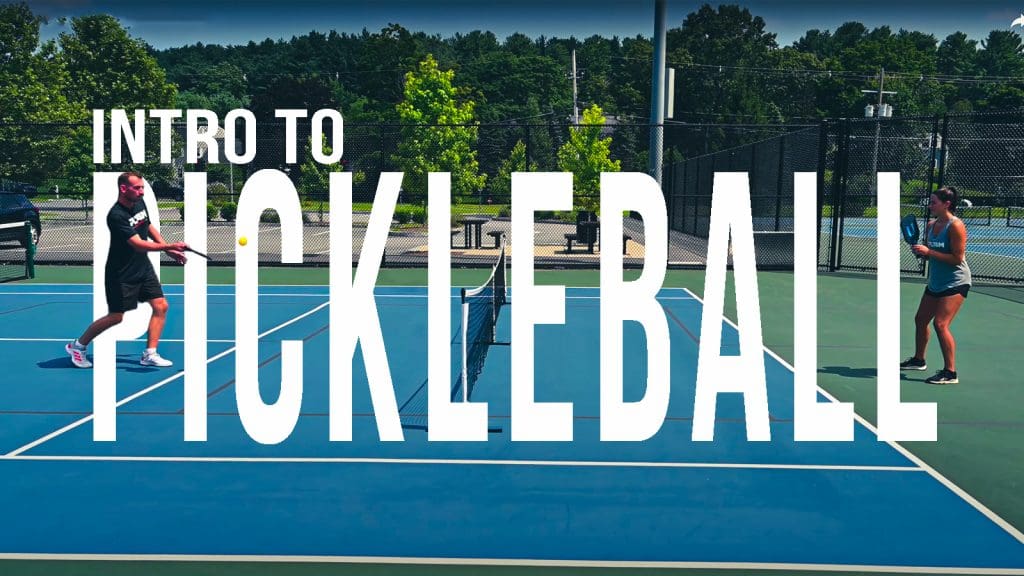
Pickleball drills for physical education serve (pun intended) as an introduction to the basic components of pickleball! These instructional materials aim to provide every student with a foundation in which they can develop their pickleball skills that will eventually lead to fun and successful gameplay. While we know everyone is eager to get right into pickleball games, breaking down and practicing the different elements of pickleball can go a long way!
Importance Of Pickleball Drills For Physical Education
A big reason for pickleball’s growing popularity is its accessibility to a wide range of ages and skill levels. But even with its relative ease to learn, that doesn’t mean we should skip over pickleball skills and jump immediately into a pickleball game.
If our goal in physical education is to build skills and confidence in a myriad of activities, we should take the same approach to our pickleball unit. Like any activity in physical education, a pickleball unit can offer students a chance to practice and develop key skills that will build confidence and comfort in the sport of pickleball through PE lesson plans.
In a short amount of time, students of all skill levels can start to feel like confident pickleball players and enjoy the game for many years to come. And yes, you can start to move from pickleball drills for physical education to full-fledged games.
High Level Goals of Pickleball Drills For Physical Education
Before starting to talk about dink shots, serve placement, and backspin remember that pickleball consists of some basic components and key skills that students should practice and develop. The best pickleball drills for physical education are the simple drills that will introduce students to the foundational elements of racquet sports. These fundamental categories include:
Forehand
Backhand
Rallying
Overhand
Serve
Our goal in many of these drills is developing muscle memory through repetition. Therefore, we want pickleball drills for physical education to focus on working as partners, not opponents. Encourage students to work together so that they can begin to learn the different types of shots and skills to be successful pickleball players.
Added bonus! Teaching and introducing these basic elements of pickleball makes your PE lessons shape standard aligned!
7 Pickleball Drills for Physical Education
Below you will find 7 pickleball drills for physical education that are from PLT4M’s Intro To Pickleball program. The full program comes fully loaded with more drills, technique tips, rules, and other components that help students become confident pickleball players.
For all of our pickleball drills for physical education, including the ones below, we recommend spending at least 10 minutes to first introduce the skill/drill and allowing students to break off and practice. Teachers can mix and match drills and always return to previous drills to further improve students pickleball skills.
Few programming notes: In addition, please note that these videos show mostly close range rallying and takes up only half the court. This means multiple groups can be on one court at a time (or even not practice with a net to start). In the full program, we do begin to work on longer shots but still only require half a court.
Finally, besides the overhand rally (which is a brief section) we don’t focus on volley shots in this beginner series because we want students to get comfortable hitting an easier shot off the ground before progressing to volleys.
Forehand Drill # 1 - Thrower & Hitter
A forehand in pickleball is when a player hits a shot with the palm of their dominant hand facing the net. Forehands can be used for groundstrokes, volleys, and dinks. For many players, the forehand will be their best shot, as it often feels the most natural. Therefore it is an important shot to practice in our pickleball drills for physical education!
The goal of this first drill is to practice the motion of the forehand both with and without your paddle. After 5-10 turns, rotate who is the thrower and who is the hitter.
Set Up: If practicing with a net, both partners should stand just outside of the kitchen. This drill only takes up half the pickleball court so two groups can practice on one court. If practicing without a net, stand about 15 feet away from each other.
Partner 1: (Thrower)
Start with ball in hand (no paddle)
Step with opposite foot as throwing hand moves forward
Release the ball between knee and waist level
Follow through to target looking to aim ball so that it bounces in front of partner 2
Partner 2: (Hitter)
Start in the ready position.
As the ball approaches, set your body up so that your non-paddle shoulder is facing the ball. Your paddle hand should be set up behind you on the backswing
As the ball reaches you, turn your shoulders so they are square with the ball. Step into the shot with your opposite foot. (This can also be done stepping with front foot.)
Bring your paddle through to make contact with the ball with the paddle head.
Follow through with the shot after contact for power and accuracy before returning to the ready position for the next shot.
Forehand Drill # 2 - Partner Rallying (Short)
Once we have practiced the basics of forehand shots, we can begin to start rallying with a partner in our pickleball drills for physical education. Remember, we are not looking to score points, but rather work with our partner to accumulate consecutive hits. To start, we will work on short range forehand rallying. The closer we stand, the easier the rallying will be to control.
Set Up: If practicing with a net, both partners should stand just outside of the kitchen. This drill only takes up half the pickleball court so two groups can practice on one court. If practicing without a net, stand about 15 feet away from each other.
Steps:
To start, the partner with the ball bounces the ball in front of them to set up for an easy forehand shot
The goal of each hit is to get the ball over the net to land and bounce in front of your partner on their forehand side (For now, we do not want to be volleying the ball meaning hitting it directly out of the air)
Feel free to move in space to set up and prepare for your next shot
If at any point you lose control of your forehand rally (it goes to backhand, goes to other area, hits the net, etc) reset and start with another underhand serve to restart your rally
Work to achieve 10 or more cumulative shots back and forth with your partner
Backhand Drill # 1 - Thrower and Hitter
A backhand in pickleball is when a player hits a shot with the palm of their dominant hand facing away from the net. Backhands can be used for groundstrokes, volleys, and dinks. For many players, the backhand can be a difficult shot to start and will take time to develop. Be patient and take your time practicing this skill during our pickleball drills for physical education.
The goal of this first drill is meant to simplify the backhand practice. Before we get into rallying, we will have one partner toss the ball, while the other works on practicing backhand shots.
Set Up: If practicing with a net, both partners should stand just outside of the kitchen. This drill only takes up half the pickleball court so two groups can practice on one court. If practicing without a net, stand about 15 feet away from each other.
Partner 1: (Thrower)
Start with ball in hand (no paddle)
Step with opposite foot as throwing hand moves forward
Release the ball between knee and waist level
Follow through to target looking to aim ball so that it bounces in front of partner 2
Partner 2: (Hitter)
Start in the ready position.
As the ball approaches, set your body up so that your right shoulder is facing the ball. Your pickleball paddle hand should be set up behind you on the backswing
As the ball reaches you, step into the shot with your lead foot and paddle hand.
Bring your paddle through to make contact with the ball with the paddle head.
Follow through with the shot after contact for power and accuracy before returning to the ready position for the next shot.
Backhand Drill # 2 - Partner Rallying (Short)
Once we have practiced the basics of backhand shots, we can begin to start rallying with a partner. Remember, in our pickleball drills for physical education we are not looking to score points, but rather work with our partner to accumulate consecutive hits. To start, we will work on short range backhand rallying. The closer we stand, the easier the rallying will be to control.
Set Up: If practicing with a net, both partners should stand just outside of the kitchen. This drill only takes up half the pickleball court so two groups can practice on one court. If practicing without a net, stand about 15 feet away from each other.
Steps:
To start, the partner with the ball bounces the ball in front of them to set up for an easy backhand shot
The goal of each hit is to get the ball over the net to land and bounce in front of your partner on their backhand side (For now, we do not want to be volleying the ball meaning hitting it directly out of the air)
Feel free to move in space to set up and prepare for your next shot
If at any point you lose control of your backhand rally (it goes to forehand, goes to other area, hits the net, etc) reset and start with another underhand serve to restart your rally
Work to achieve 10 or more cumulative shots back and forth with your partner
Free Flow Rallying - Forehand & Backhand (Short)
Now that we have focused specifically on the forehand and backhand, we can start to take our first step towards the natural play of pickleball with our pickleball drills for physical education. Here, we will begin to take a more free flow approach to rallying, still following some basic parameters on distance and space.
We will return to a closer distance and begin to hit shots both forehand and backhand depending on where the ball lands just outside of the kitchen line aka non-volley zone. Play around with alternating shots and remember to always return to the ready position so that you can move to your next shot with ease.
Set Up: If practicing with a net, both partners should stand just outside of the kitchen. This drill only takes up half the pickleball court so two groups can practice on one court. If practicing without a net, stand about 15 feet away from each other.
Steps:
To start, the partner with the ball bounces the ball in front of them to set up for an easy shot over the net
The goal of each hit is to get the ball over the net to land and bounce in front of your partner – mixing it up and starting to play with varying your shot placement
Feel free to move in space to set up and prepare for your next shot
Focus on returning to the ready position after each shot so you can more easily hit forehand and backhand shots
If at any point you lose control of your ally (it goes to forehand, goes to other area, hits the net, etc) reset and start with another underhand serve to restart your rally
Work to achieve 10 or more cumulative shots back and forth with your partner
Overhand Drill # 1 - Hitter & Thrower
During pickleball, players will spend most of their time using the forehand and backhand. But at times, a ball might be high in the air and present the opportunity for an overhand shot. The overhand shot is one of the most fun pickleball shots because you get the opportunity to give the ball a good wack. Remember though, you can always let the ball bounce and then hit a normal forehand or backhand shot.
But if the overhand shot is something you want to learn and practice (which we encourage) let’s unpack the steps to achieve a proper overhand strike through our pickleball drills for physical education. To do this, we will only be using one drill so that we can guarantee a safe and accurate shot.
Set Up: If practicing with a net, both partners should stand just outside of the kitchen. This drill only takes up half the pickleball court so two groups can practice on one court. If practicing without a net, stand about 15 feet away from each other.
Partner 1: (Thrower)
Start with ball in hand (no paddle)
Step with opposite foot as throwing hand moves forward
Release the ball between knee and waist level
Follow through to target looking to aim ball high in the air so partner 2 can practice an overhand strike
Step back so that partner 2 can take a clean overhand strike and you don’t get hit with the ball
Drop Serve Drill
A pickleball serve must be hit with an underhand stroke so that contact with the ball is made below the waist, defined as the navel. The arm must be moving in an upward arc, and the highest point of the pickleball paddle head shall be below the wrist when it strikes the ball.
There are two types of basic pickleball serves – volley and drop. The volley is a more challenging serve where a player releases the ball and hits it on a volley. The drop serve is easier as it allows players to have the ball bounce in front of them before hitting the serve.
For now, we will practice the drop serve.
Drop Serve
Set Up: Partner 1 starts behind the baseline and partner 2 stands in the opposite service court. Multiple people can rotate and practice serving.
Partner 1:
Start with the ball in your opposite hand, reach out and drop the ball (don’t throw)
Allow the ball to bounce on the ground and begin your underhand swing and contact the ball in front of your body
Follow through with a smooth fluid motion
The goal is to hit the ball into the opposite service court area (diagonally across from you) and the ball must not bounce in the kitchen
Wait for your partner to return the ball and then pick it up and repeat serve steps
Partner 2:
Hit any type of shot back to your partner so that they have the ball for another serve
The goal of this drill is to simplify the serve. Because you are not playing full points or games, you can have two groups or even more people practicing at once. Hopefully though, one person can practice multiple serves in a row to get confident and comfortable with this important part of the game.
Bonus! More Than Just Pickleball Drills For Physical Education
Once students have worked on their pickleball drills for physical education, they are ready for their first actual games of pickleball. As an added bonus, included below are two bonus instructional videos from PLT4M’s Intro to Pickleball series. Once students have improved their skill levels and are ready for a game of pickleball, they need to understand the basic rules of pickleball. Here are two videos outlining the serve rules of pickleball and an overview of how pickleball scoring works.
Serve Rules
Serve Rules
First, let’s talk about the basics of the pickleball serve and return shot. The following rules outline the steps to the serve and return.
- A pickleball serve must always be made with either an underhand or backhand motion. To clarify, this means the server’s arm must move in an upward arc when the ball is struck. No hitting from above, or from the side.
- The point where the pickleball paddle makes contact with the ball must be below your waist. The taller you are, the higher this point will be.
- The paddle head must be below the highest part of your wrist at contact. This requirement helps emphasize using an upward arc motion. The entire paddle must be below your hand rather than above it as you hit your serve.
- A pickleball serve must land in the diagonally opposite service area. Pickleball serving rules state that the serve is always made diagonally across the court, similar to tennis. A pickleball serve cannot land in the kitchen, touch the kitchen line (non-volley zone), or in the non-opposite service court.
- The person returning the serve must let the ball bounce before hitting the return shot. The return shot can go in the area of the opposing court.
Double-Bounce Rule
- When the ball is served, the receiving team must let it bounce before returning, and then the serving team must let it bounce before returning, thus two bounces.
- After the ball has bounced once in each team’s court, both teams may either volley the ball (hit the ball before it bounces) or play it off a bounce (ground stroke).
- The two-bounce rule eliminates the serve and volley advantage and extends rallies.
Scoring Pickleball
- Games of pickleball are played to 11 points, win by at least 2
- Only the serving team can score points
- The score of pickleball is announced using three numbers
- Serving Team Score
- Opposing Team Score
- Server 1 or 2
- When the serving team scores a point, the two team members alternate sides and the current server now serves from the opposite side
- If the serving team loses the rally when server # 1 is serving, then server # 2 becomes the server
- If the serving team loses the rally when server # 2 is serving, then this is called “sideout” and now the opposing team starts serving with server # 1 in the right service box
- This sequence carries on throughout an entire game until a team reaches 11 points
- *First Server Exception: To minimize the advantage of being the first team to serve in the game, only one player, the one on the right side, gets to serve on the first service turn of the game. Since the serve goes to the other side when that player loses the serve, that player is designated as the second server. Therefore, at the start of the game, the score should be called, “0-0-2.” The “2” indicates the second server and means that the serve goes to the other side when the serve is lost.
Example of scoring a match: (As outlined in the video)
- Currently the serving team RED has 5 points. The opposing team GREEN has 4 points. Server # 1 is serving for the RED team from the right side. The score is 5 – 4 -1.
- Next, the serving team RED scores and has 6 points. The score is 6 – 4 -1. And the serving team RED alternates sides so that server # 1 is serving from the left side.
- Now, the serving team RED loses the rally. Reminder, the opposing team GREEN doesn’t score a point. Instead it now becomes server # 2’s turn and the score is 6 – 4 – 2.
- Serving Team RED loses the next rally which results in a SIDEOUT. Now the scoring sequence flips and becomes serving team GREEN (4 pts), opposing team RED (6 pts) and server # 1 for GREEN is up. The score is now 4 – 6 – 1.
- Serving Team RED wins the next rally and scores a point. The score is now 5 – 6 – 1.
- Serving team RED loses a rally and score remains the same but now server # 2 is up. The score is now 5 – 6 – 2.
- This sequence continues until a team reaches 11 points.
Key Takeaways on Pickleball Drills For Physical Education
Pickleball drills for physical education can turn a novice pickleballer into a seasoned player. When it comes to pickleball drills for physical education, we encourage physical education to start small and start with the basics!
Once students get comfortable with the basics of pickleball, then you can begin to work on more advanced volley shots, strategic thinking around game play, backspin, topspin, and more.
As the sport continues to grow in popularity among all generations, pickleball drills for physical education can create an opportunity for every student to explore the fun and exciting game.
Want more drills and skills? Reach out to PLT4M for more information!


